Showing posts with label Honeydew list. Show all posts

Sunday, April 12, 2015

Its about time Project #3.2

You may remember that we wanted to build a shade structure to protect our pool equipment from the damaging rays of the Arizona sun.

We considered our area and decided on an odd shape, but one that keeps the uprights out of the little wash and provides maximum shade.

We chose the angle, again, to allow maximum shade from the summer sun, allows room for repairs to the equipment, and hopefully, reduces the likelihood of a banged head on the structure itself (I will let you know later if we were successful on the hopeful elimination of head banging :).


We had purchased extra shade cloth fabric when we bought for our shade structure project...   but when it came time to use it on this project, it was no where to be found.  While chatting about it, DS overheard and let us know that it was at his house.  No wonder we couldn't find it.

The fabric was retrieved and installation was initiated!

We trimmed the fabric the approximate size and shape of our structure and laid it out, letting the sun soften it a bit.

We then used aluminum strips to screw through the fabric into the structure, pulling it taught as we worked our way from middle to edges.


We had predrilled the holes in the aluminum before we started to make things a bit easier. 

We used self tapping screws to secure the aluminum strips, through the shade cloth, into the structure to complete the attachment.

The stretching fabric, holding taught, screwing into the structure, and trying to keep the lines of the fabric somewhat straight was a bit like patting your head and rubbing your tummy at the same time but the hubby and I persevered!


VIOLA!!! Its completed!!  well, except for cleaning up the mess :)


Another long awaited project DONE!

Wednesday, March 18, 2015

Its about time project #5.1: path to gazebo

We have this gorgeous gazebo on our property.  It was donated by the previous owners but we love it. We planted a trailing lilac next to it to provide shade...  and its flowered beautifully!  


We also used some genuine flagstone that we purchased 2nd hand to build a path to the gazebo from the pool deck.


Just one small problem...  the wash.  At this point, I have a beautiful path to....  well, no where.  It stops at the wash.  Its a road to no where....  and that reminds me of a song that was sung to me long ago and far away....


Of course, now I have to share some of the lyrics with you.  All lyrics are taken out of context for the sake of my path's story:

~ Cab fare to nowhere
       ~ A white line to an exit sign
                ~ A locked door on a candy store
                         ~ A slim chance in tight pants
Ok, enough reminiscing...  back to our story!

We have flagstone on both sides of the wash...   but nothing connecting the two sides to span the wash.


So I whined and cried because when I go out and feed the birds, my slippers were getting nasty from walking thru the wash.

(and don't say "put some shoes on !!
say "build a bridge"!)

So DH did just that....  he built me a bridge over the wash...  so my "princess" feet do not get dirty.

Well, the steel fabricators bend the frame in that arc...  but he planned it and welded it all together.


But Houston, we have a problem.... 

You can't walk on the bridge!!


A trip to the local big box hardware store netted the boards and the carriage bolts.
I am the painter in the family; not that this is really painting...  After a couple days of drying, I was bestowed with the honor of applying the treatment.


In the photo to above, all but the three boards in the lower left have been treated.   I loved that you can literally watch them change colors in the photo below.

After a day or two of drying, they will get retreated and, again, left to dry.

Stay tuned for installment #5.2.

And FYI - I am SO done with this stuff - I want to get back to my quilting!

Monday, March 16, 2015

Its about time project #4.1: Courtyard

Our front courtyard area has been long neglected.  I really wanted to see what we had before I bought any more 'stuff'.

I wandered around the yard, looking at what we had and working through some thoughts for the area.

I found a pile of these faux flagstone that I bought for a project but soon figured out that they were not durable enough for what I had in mind.

We had just piled them up waiting to...  either use them, sell them, or trash them.

DH rolled his eyes when I realized I couldn't use them - another unnecessary purchase... but I will get the last laugh!  But they were just what I needed to jazz up the courtyard a bit.


I cleared a spot in the rocks, leveled with sand, and placed four of the larger faux flagstones.  

I had to make sure that the top of the flagstones were level, then situated the bird bath on top. 

My plan is to run a hose from the sprinkler system into the bath so it stays filled, or at least stands a chance of staying filled.  Now I have to find a cute little 'something' to put in the bath to stabilize the fill hose.

I need to clean the bath out but I was on a roll and didn't want to stop to clean it.

Next, I took on the area under the shelves we had custom built to fit around the spigot in the courtyard.  It was always messy looking and it was hard to get to the weeds that were growing under it.  

Again, I spread sand to level and placed the faux flagstone under it.  This time, I filled the cracks with sand.  After the sand settles, I will sprinkle rocks into the cracks.


Its still not "house beautiful" but its a cleaner look and definitely better than it was.  

Here is a glimpse of the next courtyard project....


Lots still to do but its finally, or way PAST, time to do something with the courtyard.

Friday, March 6, 2015

"its about time" project #2 and #3.1: House numbers and pool equipment cover

Our second installment of working on all those projects around the house that we were all gung-ho about doing....  and STILL want to do, but haven't gotten them done yet.  They had become a WAY too long list and we needed to actually do them.  Sadly, the items on the list are fairly beneficial (one way or the other) things...  not just a 'hang a different picture' type thing.

An extended illness and some back problems have kept me from getting the list whittled down...  actually its gotten longer.   <sigh>


Project #2:  Viable and Visable House Numbers

In Arizona, plan on it being hard to find addresses...    anywhere.  The wide open spaces seem to make the numbers that (may be) there, hard to see....  and the limited lights at night make the whole address finding thing even tougher.  

Our numbers were previously near the front door.   Not much good as one would have to leave the comfort of their car and walk up to the door just to find out that you may have the wrong house.

So we added numbers near the end of our driveway.  The are of normal size but the wide open spaces seem to have swallowed them up and they aren't really noticeable. 

The driveway side of the post around our courtyard seems to lend itself well to more numbers so the project was in place.  For those keeping track, we are now at the 2 year mark owing this house.

We drilled out and ground out the space for a set of numbers that we found in the garage when we bought the house but that go-around ended in a pile of dust at the foot of the post.  Note the three year mark.

Now we have a hole to fill.    So the search for new numbers began.   and progressed.....   slowly.

Then my cousin Colleen drew my attend to a booth that we were perusing at the Mesa Flea Market.  EUREKA!!  numbers!!!   after a bit of disappointment, hope, running around, and losing each other, we found the numbers I wanted.  I, oh so carefully, brought them home and placed them on the table ever so gently.

DH adjusted the opening a bit and gave me the responsibility of attaching them to the post.

It was about time....  and we are thrilled!   One more checked off the list !!!

Stop by and see our new numbers !!!

Project #3.1:
A shade cover for the pool equipment

Another long-time coming project.  The Arizona sun is a mixed blessing and we wanted to protect the costly pool equipment from the damaging rays.

We started with a very complicated and detail plan.  I did actually get a tape measure out to draw up these plans too!!


We also needed some tools.....


We wanted to keep the uprights out of the wash so we decided to go a little crazy on the design and create a shape that does not match the square-ness of the house, but gets the shade where it needs to be.


Its getting there!


And the frame is up, painted, and ready to be covered.  And I think the hubster is pretty proud of it, as he should be.  It looks perfect to me!!!


We choose this shape after much discussion....  Its triangular shape keeps the legs out of our little wash.   Its higher on the north side so that if work needs to be done on the equipment, someone can get under there.  Also, the center support is removable, if needed.   The lower brace on the south side (nearest the photographer) will provide the support for the lower edge of the sunshade fabric.

Covering the structure will be another installment (#3.2) and we will be doing more fun, and useful, projects to check off our list.
~*~

I wanted to include the door of the shed that appears in the background the above photo.  I just LOVE our upcycled door handle.  We found it at a flea market and I bugged the hubby until he went back and bought it.


Stay tuned for the next crazy thing we start working on !!

Wednesday, December 10, 2014

"its about time" project #1

Yanno all those projects around the house that you were all gung-ho about doing....  and STILL want to do, but haven't gotten them done yet?  For us, they seem to end up being a list before we decide to actually do them...  and the really stupid thing about them is that they really are beneficial (one way or the other) things...  not just a 'hang a different picture' type thing.

#1 example:

Our 'big' house in Iowa had Corian countertops, which we removed and replaced with granite - thank you amazing son (AS), Mike.  Side note: the buyers loved the granite when we decided to move to AZ and sell the 'big' house.  We kept the Corian, thinking we would replace the laminate countertops in our 'little' Iowa house with the Corain as it was a very close fit and AS could make the adjustments.

Well, that never got done BUT we figured out that the Corian from the 'big' Iowa house was exactly the same Corian in the AZ house.  We sold the majority of the Corian but kept the piece from the kitchen island so that we could use it in the AZ laundry room as a countertop.

THEN I got the brilliant idea to replace the AZ island countertop with the Iowa island countertop....  because the way it was set up, there was hardly enough room between the island and the refrigerator to pull the fridge out if you need to (like cleaning under and behind or retrieving dropped things behind).  

Of course, I forgot to take the PRE photo while the old countertop was still attached to the island.  Here is a photo of the old countertop piece with DHs bowl of candy as reference.

The Iowa island was narrower, which would make more room between island and fridge, and lots longer, making room to put a stool or two at the island (YA!). 

Lets just say that the ONE thing I know about Corian is that it is NOT forgiving.

I will tell you that I was nervous about starting this project.   So, a call to AS Dan resulted in a step by step over the phone on how to do this....  of course, providing that we live in a Walgreens world where everything is perfect.

With much trepidation, we began the project... and, lo and behold, we apparently DO live in a perfect world - at least for this project.  The old countertop came off just fine and the new went on with only one call to an amazing son for some pointers to reattach the new countertop.

The finished countertop is larger by a square foot but it seems  it has FAR more useable space AND more room between the fridge and the island countertop.   I am in LOVE.   And DH loves his candy bowl back where it belongs.


I think I see me making some pads for the stools in the near future.

The last step of this project was to make an emotional call to AS late last evening thanking him for walking us through the removal and replacement process.  

and yes, there will be more 'its about time' projects...  stay tuned.

Don't wait to do those things you want to do....  do them NOW...  and for YOU.... its PASSED time to start enjoying your life, your love, your interests, your desires.

Monday, March 17, 2014

MORE Construction....

Sunday's Update:

We are done ! ... well, we are done with the shade structure.  There is a lot of clean-up, etc. left to do but we are all happy happy happy with it!  We still have a few details to work out:  Where to put the outdoor furniture, where to place the planters, if I want planters to go around the bottom of each viga, etc.

DS doing some trimming of excess shade cloth
I know "walking a wall" is a desirable trait in DS's line of work but,
as a mother, it makes me cringe.
 
It has already made a HUGE difference in the sun exposure.

DS relaxing in our amazing new shade!!

The final photo will have to wait....  the camera's battery gave up the fight... the I was distracted,.... and then it was dark.  I will post the final photo soon.

Now we just need to clean up the mess from the multiple projects we have had going on lately!

May your day see the completion of something on your to-do list.


Saturday's Update:

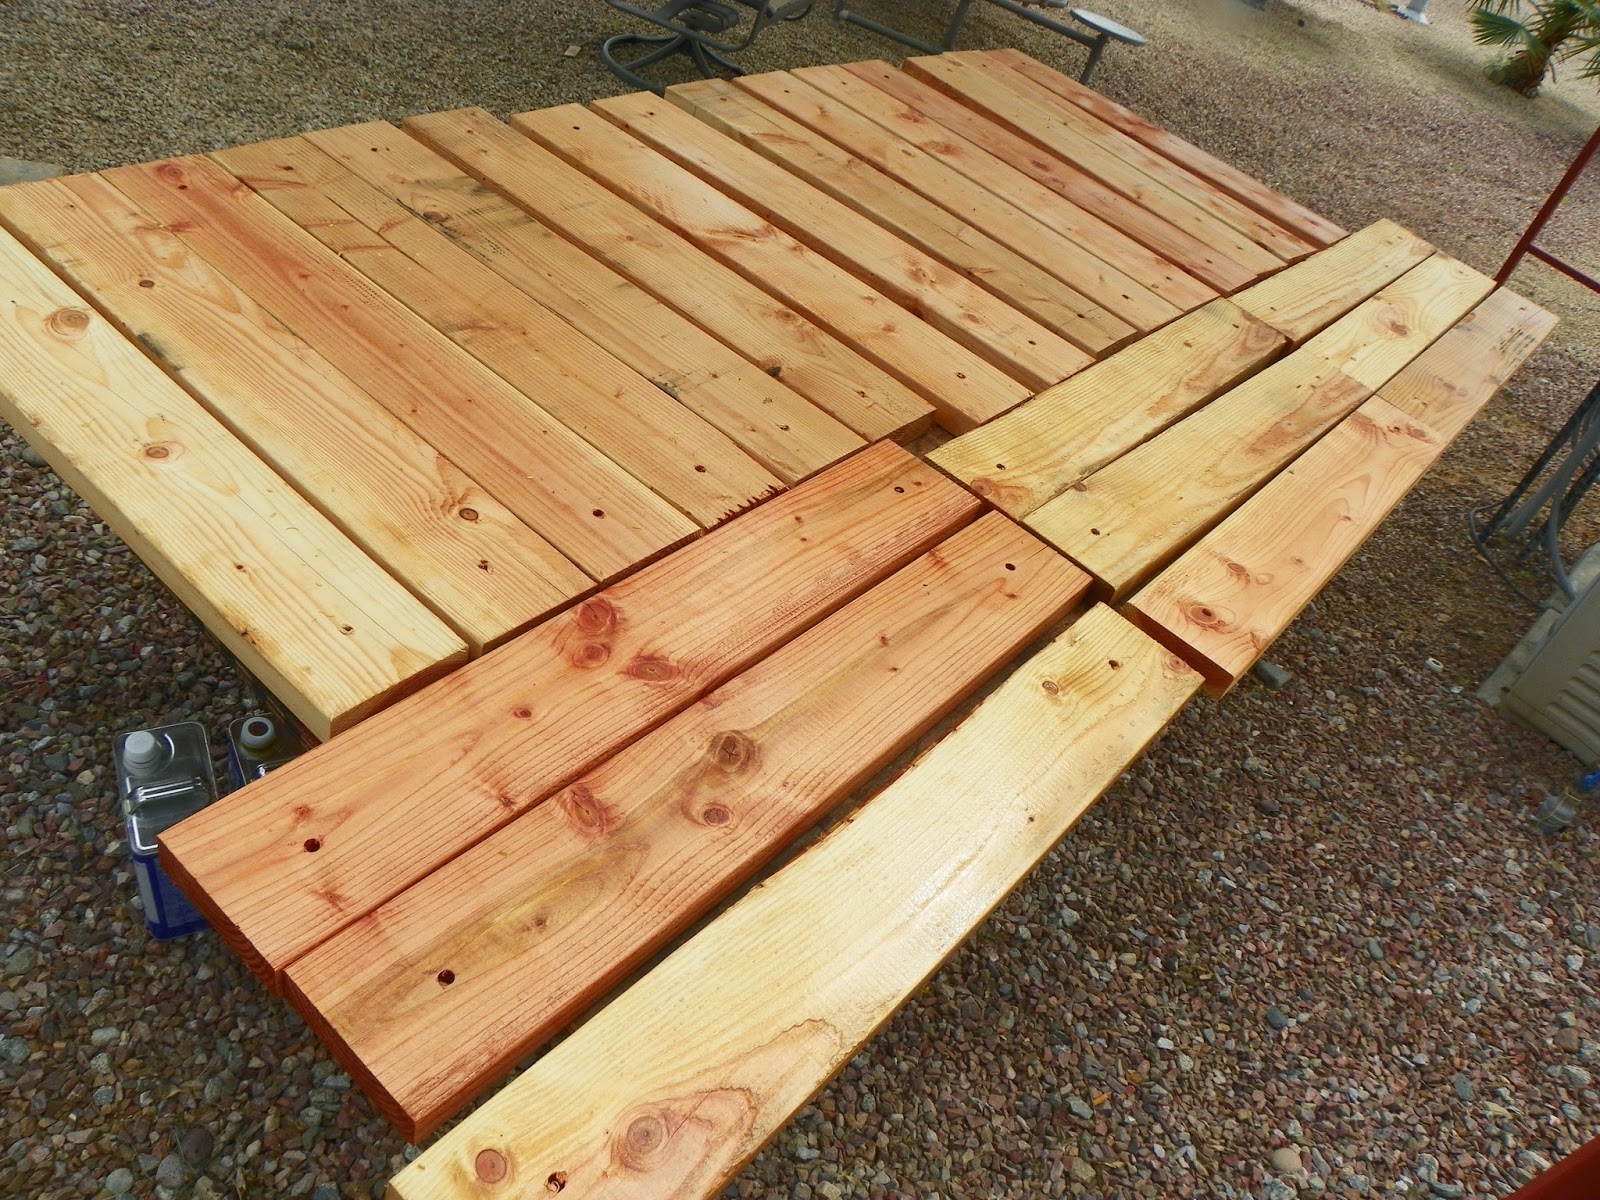
The supplies for the weekend....  

Aluminum straps, shade cloth, and LOTS of screws.

Also, 4 ladders, an impact driver, a drill press, and lots of clamps.


First step was to lay the shade cloth, the long way, on the top of the structure next to the house. 

The shade cloth was then attached to the structure along the house.... 


Then we unrolled the cloth and worked our way to the outside of the structure, attaching it as we went.

(Ignore the super young and super sexy girl on the ladder...  HA!)

We got about half of the shade up in about half of a day today.  We will install the rest of the shade cloth tomorrow....

...complete some minor adjustments and trimming that have to wait until the end.....


...and then do the clean up...

...and arrange the outdoor furnishings!!

Trust me that pictures do not do this project justice!  This is a way COOL (in more ways than one) project! 


Friday's Update (a week later):

DS will be back up tomorrow morning to put the shade cloth on the structure.  Have I mentioned how excited I am to have all this new shade??  AND, if the boys can spare me, I am going to hit a yard sale tomorrow that is featuring fabric....  yes, you heard me:  FABRIC!

Life is good!!!


Friday's Update:

DS left Friday morning about 9am as we could NOT get the dealer to confirm if the shade fabric we ordered to be attached to the top of the structure had been sent.  We had some errands to run all over the north valley and when we got home, guess what has been delivered at 1.30pm?  Yep, the shade fabric.  We had already made plans for him to return next weekend to install the fabric on our prayers and hope that it would be delivered before next Friday.

We spent the afternoon cleaning up a bit and straightening things around so that we would be ready for installation next weekend.  We are VERY VERY excited that this plan is TOTALLY coming together.  I even installed (with DS's assistance) a hammock chair that I think will be perfect for reading.

I will post photos of the finished structure with it all painted and ready to go very soon.


Wednesday's update:

The last of the really hard and heavy stuff is done (I hope).  The boys worked hard today but it was a shorter day then yesterday and to celebrate, we went out for dinner in Cave Creek.  Interesting sites up there, that's for sure.

So the last of the vigas are up and the frame for the shade cloth is complete.

Tools of the trade.
Before we took off for dinner, we cleaned up a bit, picking up tools that we probably won't need again and sweeping up the debris.


It's amazing how many things can be pulled out to do a job...  and how far they can get spread out.

But then, I am a quilter..... and I have to eat the words in the last paragraph.

The most fun for me to use was the transit.  (middle bottom in collage).  It enables one to make something level over short or very long distances.


I used a magnet to pick up metal shavings. 
They are nasty little things when they get into
your skin but make pretty designs on the magnet. 


DS made an impromptu cactus from leftover pieces.


Tomorrow, the metal framing must be wiped down and then primed.  I may work on oiling the each viga with Linseed oil if I feel up to it.  I predict not feeling well tomorrow after a rough evening tonight but I hope I am wrong.
They haven't delivered the shade cloth yet so I hope that makes it soon.

Friday, I have some errands to run so I will miss some of the fun.

And sometime this weekend, I will get MY new (used) Harley Davidson!!!  yay ME!!!
Then I have to get our V-Rod cleaned up and ready to sell.  Two motorcycles is all this family needs and the V-Rod is just too fast for me - I was cursed with a lead foot (or wrist, in this case) that will just get me into trouble.  Once again, it proves that its good to know your limitations!!!


DS welding on the steel frame.

Tuesday's Update:

Another busy day at Casa del Cohoon!  Everyone worked today and we are all pooped.


Custom post base


Viga sitting on post base


DS designed and built post bases specifically for our needs.  The base is attached to the concrete and viga sits on top of the base.  


The straps on the sides of the base will come up on each side and be secured to the viga.  The base, straps, and about the bottom foot or so of the viga will be covered with a box covered with stucco, similar to the ones on our existing vigas, but the new ones will be a little shorter.


In front of the addition (man cave)
DS spent a lot of time either on a ladder or going up and down a ladder today.  The supports were all welded in place and minor adjustments were made to ensure that everything was level and secure.

I am pleased (as a mom) to announce that DS takes safety very serious and took necessary precautions.

DS's support crew (DH and me) were busy moving tools and making sure he had everything he needed where he needed it.


Have I mentioned how AWESOME this is going to be?  I am EXTREMELY pleased with how its looking.


The angled support that I think will hold our hammock chair :)
The corner of the shade structure.


6 of 7 vigas up and secured.
Tomorrow, the last viga and the last section of the structure will be built along with finishing some of the detail work.   Plus, DS has some small jobs in our area to complete this week but not sure when he will be away to do those yet.


Monday's Update:


Prior to any construction
This property has undergone a lot of changes to its exterior since we purchased it in 2011.  It was your basic overgrown desert in the back yard before DH got his hands on it.


First, we added a fence around the back yard with custom gates that DS and DH built.

Next was a spa, waterfall, and pool.


Pool added
Then came an addition, which houses a man cave, a woman cave, and will someday house a bathroom. 

But we needed something in front of the addition beside dirt....  so a large patio was added.  The new patio extended from the farthest end of the addition all the way across the back of the house.


Cool, huh?  Well, yes, but it's hot too! :).


View along back prior to addition.
It was our intention all along to put shade over the new patio...  but we were having trouble deciding what TYPE of shade.  Our options were a pergola type shade, a shade cloth type of shade, or a solid roof to match the house.   We finally decided on a shade cloth.

So, what type of structure to hold the shade cloth? 


The boys (DH and DS) wanted to do steel (insert Tim Taylor type noises).  My input was that I did NOT want a steel upright in my line of vision when looking out the window.   Stalemate - while we discussed additional options.

And then my Karma came through again!!!   I found some 4 vigas at an extremely reasonable price....  And I bought them!  We already have vigas used as upright supports at the back of our house so I am excited that it will all match!

 I go to the engineer/contractor/builder with news of my purchase.  Further discussion garnered a plan I could live with but we needed 3 more vigas to make it all work.  DH finds additional vigas, we order the steel and the shade cloth and we are ready to roll.  YAY!!

Finally, after "sort of" working on this for 6 months, we are ready to build.  DS finds a week he is willing to be away from DIL and DGC to spend with us and build our shade.

Step 1 was to bring the vigas to the build site at the back of the house.  Of course, they were dropped off at the front of the house.  Vigas are HUGE, straight tree trunks that have been stripped of their bark.  And heavy.  Very heavy.

I am trying to include a really bad movie of how the boys (DH and DS) got the vigas from the front of the house to the back of the house.  I gotta tell you:  I was pretty impressed with their procedure!  They even shoveled a little path in the rocks so their "big rigger" would roll easily.  Hopefully, I can figure it out soon!!!


All vigas present and accounted for.
Both my DSs are pretty creative but they still amaze me sometimes.  They can make almost impossible feats look so easy.


First ledger up on the addition.
First viga up with supporting bracket to ledger.
DS welding support between vigas.
End of day 1: Four of seven vigas up.


Stay tuned for updates throughout the week!
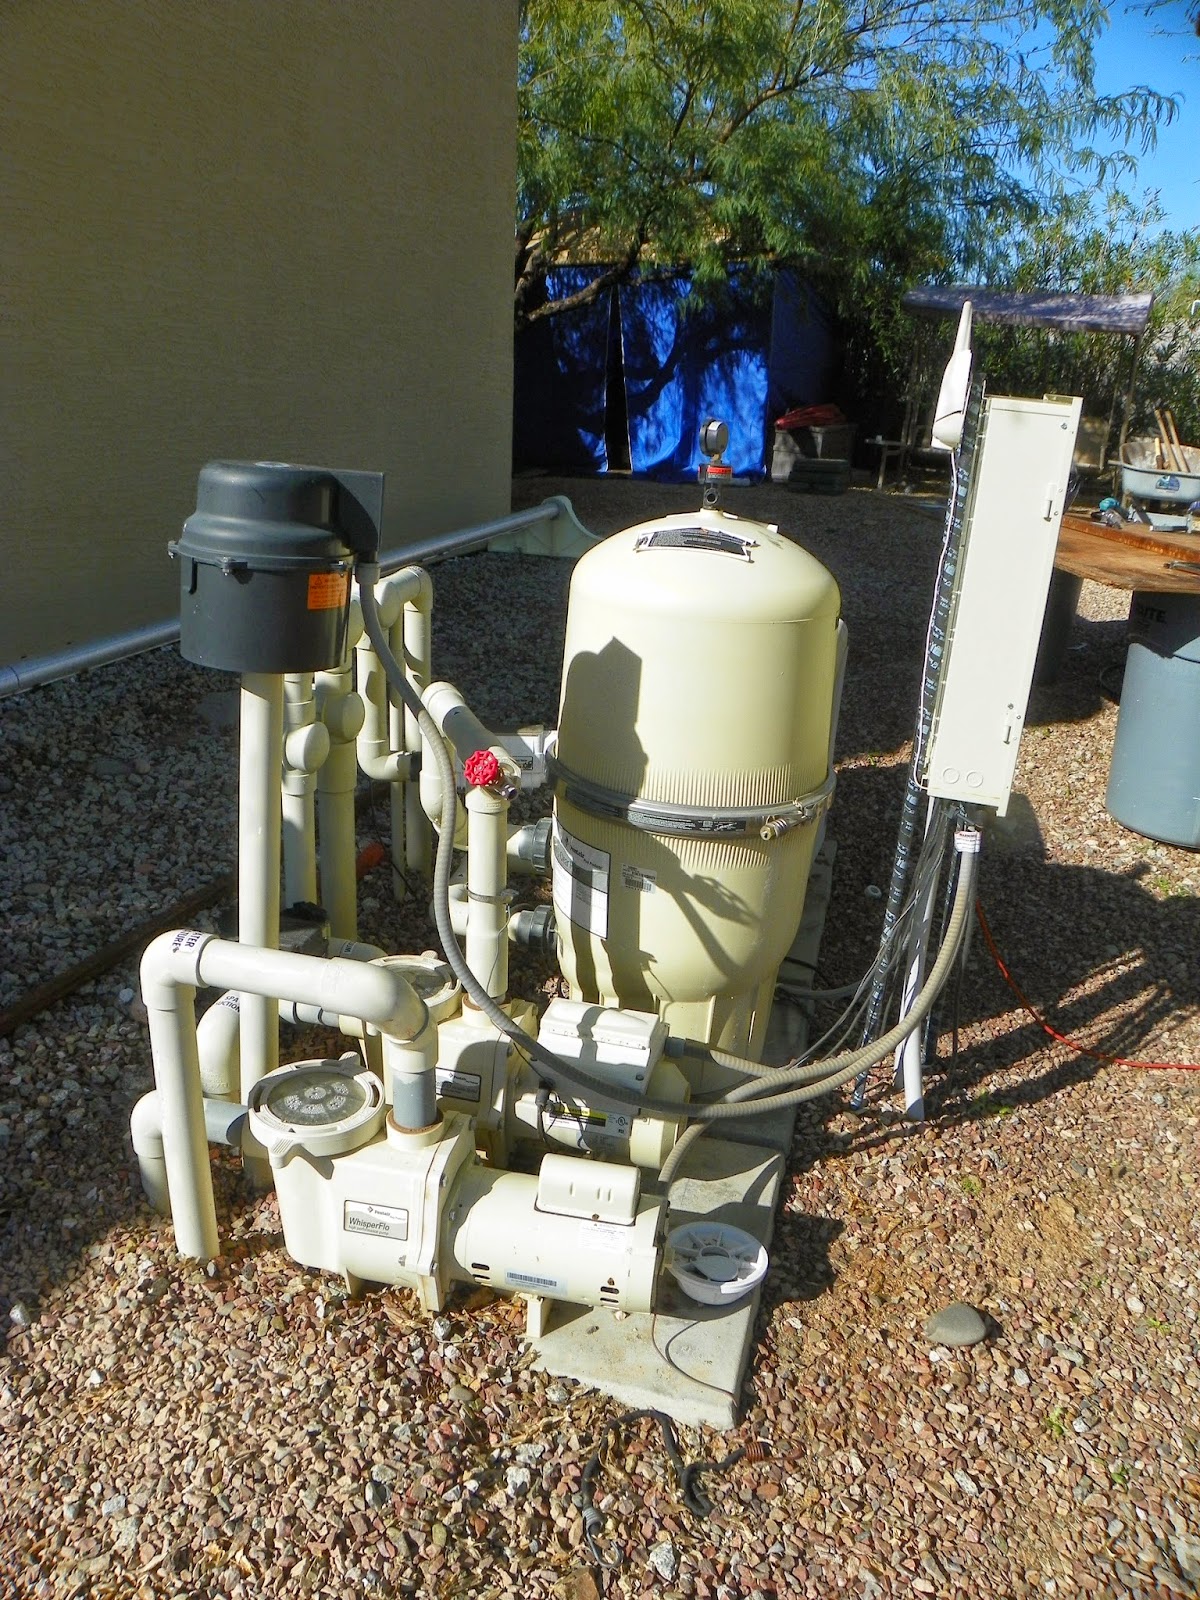